Home Theater Setup Checklist: Screen, Sound, Lighting
Home Theater Setup Checklist: Screen, Sound, Lighting, Seating, and Room Layout
A home theater feels effortless when the planning is done upfront: the right screen size for viewing distance, speaker placement that matches the room, lighting that controls reflections, and seating arranged for comfort and clear sightlines. Use this checklist-style guide to move from empty room to movie-night ready without missing the small details that affect picture, sound, and usability.
Start With the Room: Size, Shape, and Constraints
Before shopping, map the space you already have. Small room details—like a door swing or a vent—can determine where the display, speakers, and seating end up.
- Measure the room (length, width, height) and note door swings, windows, HVAC vents, and outlets.
- Identify the primary viewing wall and the best projector throw path (or TV placement) without blocking walkways.
- Decide whether the room is mixed-use (family room) or dedicated (light control and acoustic treatments become more important).
- Plan cable routes early: power, HDMI, speaker wire, Ethernet, and conduit options for future upgrades.
- Set a realistic budget split: display, audio, seating, lighting/control, and room treatments.
| Item | What to decide | Common mistake to avoid |
|---|---|---|
| Room use | Dedicated vs mixed-use | Ignoring ambient light and reflections |
| Display type | TV vs projector | Buying screen size before checking viewing distance/throw |
| Audio format | Soundbar vs 5.1/7.1/Atmos | Placing speakers without considering seating position |
| Control | Remote vs hub/app | Skipping cable management and labeling |
Choose the Right Screen and Viewing Distance
The best screen is the one that fits your room and how you watch. A bigger display isn’t automatically better if it forces awkward seating or highlights glare.
- Pick the display type: large TV for simplicity and brighter rooms; projector + screen for big-image immersion in controlled lighting.
- Match screen size to seating distance so the image fills the field of view without causing eye strain.
- Check resolution and content: 4K streaming/discs benefit most when seated close enough to see added detail.
- For projectors, confirm throw distance, lens shift, and whether ceiling mounting is feasible with your room height.
- Control reflections: matte paint, darker wall colors, and careful light placement reduce perceived washout.
For speaker placement and cinematic layout references, Dolby’s setup diagrams are a practical starting point: Dolby Speaker Setup Guides. For general viewing-angle and theater basics, see THX.
Sound System Setup: Speakers, Subwoofer, and Calibration
Audio is where “good enough” quickly turns into “wow” if you anchor everything to the main listening position and take calibration seriously.
- Choose the audio path: soundbar (fast setup), 5.1/7.1 separates (best surround), or Atmos/DTS:X for height effects.
- Anchor everything to the main listening position: center seat should align with the center channel and the display midpoint.
- Place the center channel as close to ear height as practical; aim it toward seated listeners to improve dialogue clarity.
- Subwoofer placement is room-dependent: test 2–3 locations (front wall, corner, mid-wall) to reduce boominess and nulls.
- Run room correction (Audyssey/Dirac/YPAO/ARC, etc.) and verify results: crossover settings, distances, and levels often need small manual tweaks.
- Reduce noise and vibration: isolation pads for subwoofers, secure speaker stands, and avoid rattling decor.
Fast placement reminders that prevent common mistakes
- Front L/R: keep them symmetric to the screen and toe-in slightly if the center image feels vague.
- Center: avoid stuffing it deep in a cabinet; a clear path to listeners matters more than hiding it.
- Surrounds: place to the sides or slightly behind the main seat, ideally around ear level (or a bit above).
- Subwoofer: when bass is uneven, move the sub first—small changes in placement can be dramatic.
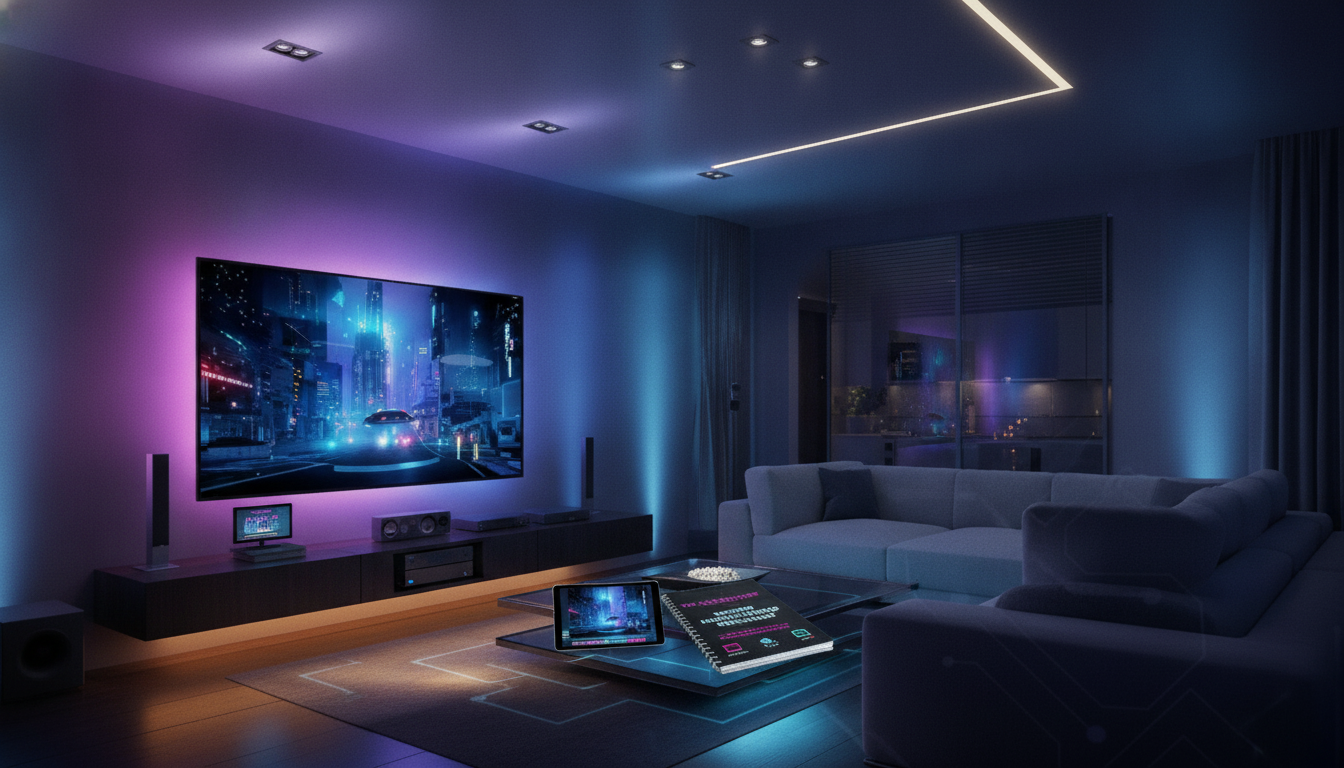
Lighting and Control: Comfort Without Screen Glare
Lighting makes or breaks perceived contrast. The goal is a room that’s easy to move around in, but invisible to the screen once playback starts.
- Layer lighting: ambient (general), task (snacks/controls), and accent (bias lighting, step lights).
- Use dimmable fixtures and warm color temperature; avoid exposed bulbs within the screen’s reflective angles.
- Add blackout curtains or shades if the room has windows; treat light leaks around doors if needed.
- Consider bias lighting behind the screen for perceived contrast and reduced eye fatigue (keep it subtle).
- Plan for simple control: a dimmer switch, smart bulbs, or a scene-based controller that ties lights to playback.
A simple “Movie” lighting scene—dim to a preset, leave a low walkway light, and kill anything facing the screen—often provides most of the benefit without rewiring.
Furniture and Layout: Sightlines, Spacing, and Comfort
Layout is where picture and sound meet real life. Plan around how people sit, recline, enter/exit, and reach remotes or snacks without blocking speakers or throwing reflections onto the display.
Cables, Power, Ventilation, and Finishing Touches
Helpful Digital Checklists (Instant Download)
- The Ultimate Home Theater Setup Checklist (printable digital download)
- Eco-Friendly Laundry Day Checklist (printable digital download)
FAQ
Is a soundbar enough for a home theater setup?
A soundbar is a practical choice for smaller rooms, simple installs, or when you want a clean look with minimal wiring. A 5.1/Atmos system becomes a noticeable upgrade when dialogue clarity, surround immersion, and smoother bass matter—especially at lower volumes.
How can reflections on the screen be reduced without remodeling?
Start by dimming or repositioning lights so nothing shines toward the screen, then add blackout curtains for windows and reduce glossy surfaces near the display. Darker, matte finishes plus soft items like rugs and curtains can cut reflections and perceived washout quickly.
Where should the subwoofer go for the most even bass?
Test multiple spots and use a simple “crawl” method: place the sub at the main seat, play bass-heavy content, then listen around the room for the smoothest bass—put the sub there. Corners can add output but may get boomy, so placement first and room correction second works best.


Leave a comment